Showing posts with label Organizational Bliss. Show all posts

January 21, 2012

Easy Shoe Storage

Pin It
Next stop in the Organizational Bliss series is shoe storage.  And it's definitely a hot topic based on the amount of activity about it on Pinterest. But few of those ideas are as easy and cheap as the solution we found at Ikea today.  

Like everyone else, we have a shoe avalanche to contend with. We also have a tot who loves her shoe variety and can be forgetful about putting them away. Of course we cut her some slack because she is only two, and, more importantly, there isn't any place designated for her shoes - until the Ikea "Kusiner" wall pockets came on the scene.


A couple of Command Hookskeep it secured to the wall.


The total for this sweet little set up?

Ikea Kusiner Wall Pockets: $3.99
A package of Command Hooks: $5.63

$9.62 for shoe storage that's compact, off the floor, non-damaging to our walls, and easy to access for our tot?  That's a little slice of organizational bliss for sure.


post signature

December 28, 2011

DIY Cleaning Solutions

Pin It

Christmas is over.  But this will not be a glum post about missing the holidays. Instead I'm excited for the new year.  Packing away the decor leaves fresh, open spaces and loads of possibilities. My guests have gone home and I'm imaging ways to hostess next year so that opening up our home will be more fun, seamless, and welcoming.  I do love Christmas, but it is time to move on and embrace what's ahead.

So this brings me to the Organizational Bliss project.  As I took down that decor, I got an eyeful of some spaces that need a good cleaning. I could blow the equivalent of dinner and a movie on cleaning products, but there are simple homemade alternatives.  I recently checked out Tsh Oxenreider's book, Organized Simplicity, The Clutter-Free Approach to Intentional Living from my local library.  The most valuable part of it for me was the bevy of cheap, natural cleaning solution recipes for just about every stain or mess in the house.  And I'm going to share them with you.

In a few places I've noted that washing soda is not the same thing as baking soda.  Washing soda, sometimes called soda ash or soda crystals, is a cleaning agent that works well on oil and alcohol based stains. It is not interchangeable with baking soda.  Substituting baking soda will reduce the effectiveness of the solution. Washing soda can be purchased at your local market and at Soap.com.  If you buy on Soap, remember to shop through BigCrumbs to get cash back. Read here for more details about how BigCrumbs works.

And now the recipes.

Carpet Cleaner, Heavy Duty
1 part salt
1 part white vinegar
1 part borax

Mix the ingredients into a paste and rub on the affected area.  Let it sit for a few hours.  Then scrub away with a brush or damp cloth.  Make only as much as you need because it doesn't store well.

Dishwasher Soap
1 part borax
1 part washing soda (*not baking soda)

Mix the ingredients and substitute in equal measures as you would for your regular dishwasher soap.  If your water is particularly hard, increase the amount of washing soda.

Furniture Polish (for unvarnished furniture only)
1/4 cup olive oil
4 Tbsp white vinegar
2 Tbsp lemon juice

Combine all ingredients in a spray bottle and shake well before each use.  Store any extra in the fridge because lemon juice can spoil. 

Glass Cleaner
 2 tsp white vinegar
1/4 gallon water

Combine in a spray bottle.  Works best when used with crumpled newspaper to wipe down the surface.


Laundry Soap
1 cup unscented, dye-free soap (such as Ivory), grated or ground with a food processor
1/2 cup washing soda (*not baking soda)
1/2 cup borax
A few drops of essential oil for scent, optional

Combine and store in a  labeled container.  Use 1 tablespoon for lighter loads; 2 tablespoons for heavy loads.

Mold Remover
1 part hydrogen peroxide (found at drugstore)
1 part water
A few drops of essential oil, optional

Mix the ingredients in a spray bottle.  Let the cleaner sit on the stain for about an hour before scrubbing off.


Oven Cleaner 
3/4 cup baking soda
1/4 cup salt
1/4 cup water
    Mix the ingredients into a paste and apply over a dampened area.  Let sit overnight.  Then scrape off and rinse clean.


    Toilet Bowl Cleaner
    1/4 cup baking soda
    1 cup white vinegar
      Combine all ingredients and pour into the toilet.  Let it sit for a few minutes, and then scrub with a toilet brush and rinse.

      Calcium, Lime and Rust Remover
      1/4 cup white vinegar
      1 Tbsp borax
      1 Tbsp liquid dish soap
      2 cups water

      Combine in a spray bottle and spray on affected areas and then scrub.  For tough spots, apply baking soda the area to add extra scrubbing power. (Recipe courtesy of this page).

      Tsh also runs a smart little blog, The Simple Mom, with lots of inspiring ways to down-size, declutter, and live life more thoughtfully.  I recommend a browse when you need a break from cleaning or maybe a post-Christmas pick-me-up.

      Happy cleaning and happy new year!

      post signature

      Image sources ||||||||||

      November 13, 2011

      Organizational Bliss: A DIY File Folder


      When I started Operation Organizational Bliss, tackling the counter tops was a top priority.  I don't need to tell anyone how easy it is for these spots to attract clutter.  You already know.  

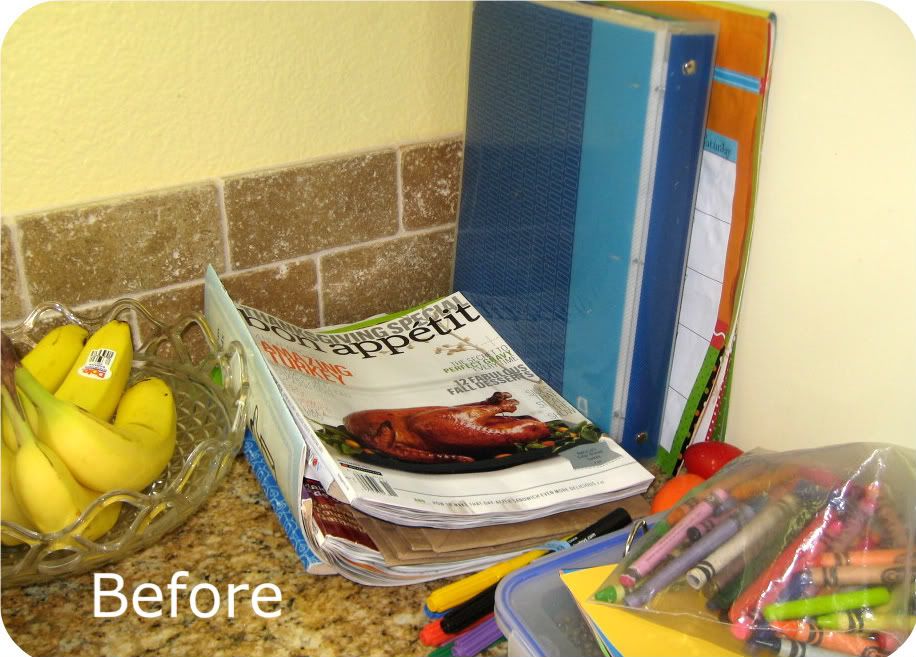
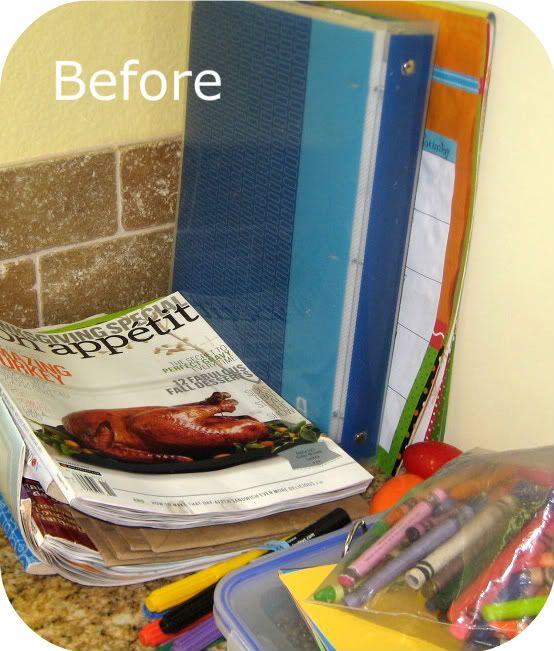
      I have one counter top that is a particular mess magnet.  It's where our tot's art project supplies accumulate.  See for yourself.


      I could try to train myself to put those things elsewhere, but that would be like trying to force a square peg through a round hole.  The craft stuff gets deposited there because it's easy to reach, and the items stay in view so they aren't forgotten. It's a natural place for them.  And I'd rather not retrain myself if I don't have to. I don't want to serve our organized spaces. I want our organized spaces to serve me.  That's when the bliss happens.

      So the craft supplies need to be in that location, in view, nicely displayed, and done on a dime.  It's a tall order.  One that will need multiple solutions.  This week, I got in gear on the first solution by DIYing a file folder to house the coloring books, loose leaf sheets of paper, sticker sheets, and a few of mom's cooking magazines too.  Sure, I could've bought a file folder.  But my local HomeGoods store wanted to sell me a cheapy cardboard version with a dizzying paisley print for $14.99.  Nuh uh.  So I made my own and customized it exactly how I wanted for a fraction of the cost. Here's the play-by-play.

      DIY File Folder Tutorial

      You'll need:
      • cardboard box
      • duct tape
      • fabric to cover
      • Elmer's glue
      • colored paper or contact paper
      • white spray paint (optional)
      • stiff card stock (optional)

      Step 1
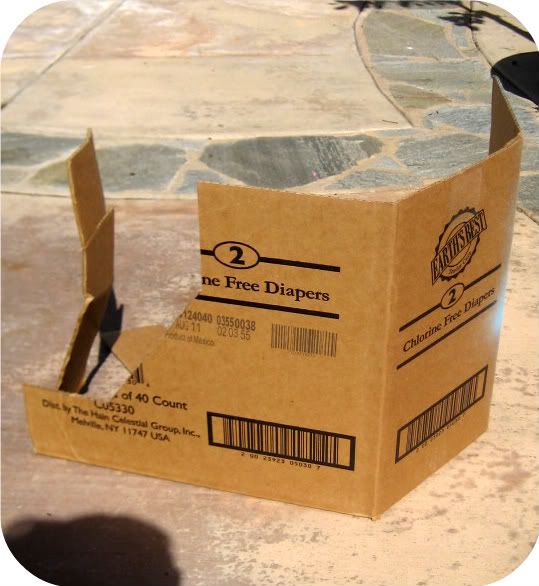
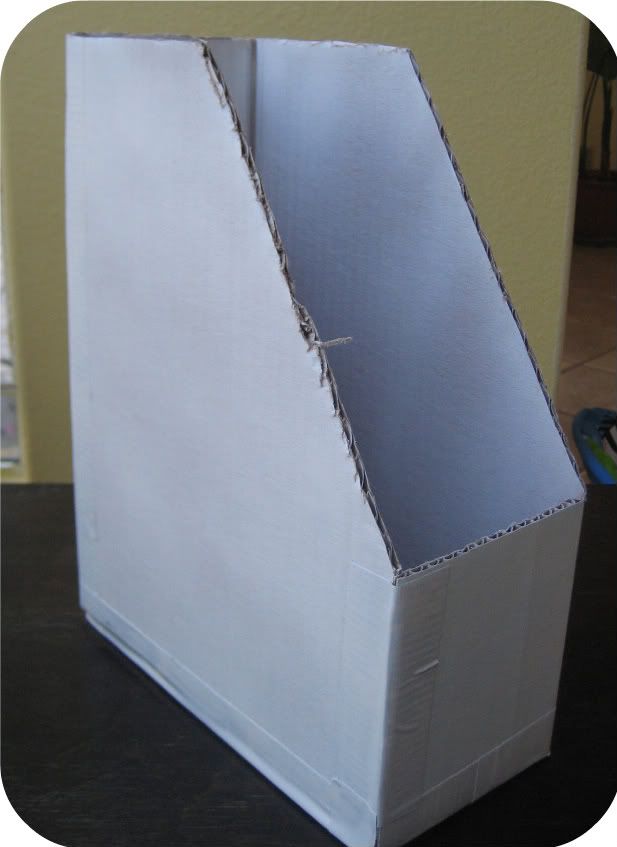
      Step 1 - Start with a sturdy cardboard box. The thicker your cardboard, the nicer your final product will be.  Cut out the pieces to form the sides and bottom of your file folder.  I'm not getting super detailed on this because the pictures tell most of the story.  For a rough idea on dimensions, this file folder is approximately 12" h x 9" l x 4" w.  


      Step 2

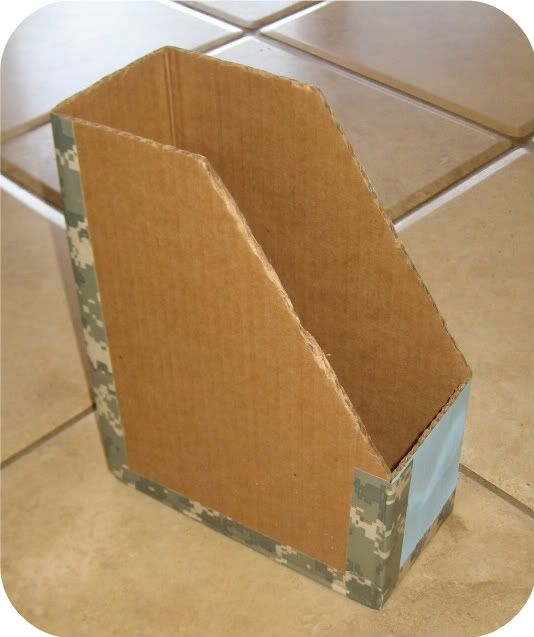
      Step 2 - Tape the sides and bottom of your file folder together using a thick tape.  Duct tape is an obvious choice.  You can use camo colored duct tape if you want it to look extra tough like mine. Hooah!  Another reason to use duct tape? It will help seal the bottom from any spills that happen on the counter top.

      Step 3
      Step 3 (optional) - I knew my fabric was thin and that striking green duct tape would show through.  So I spray painted my file folder white.  Skip this if your fabric provides enough coverage.

      Step 4
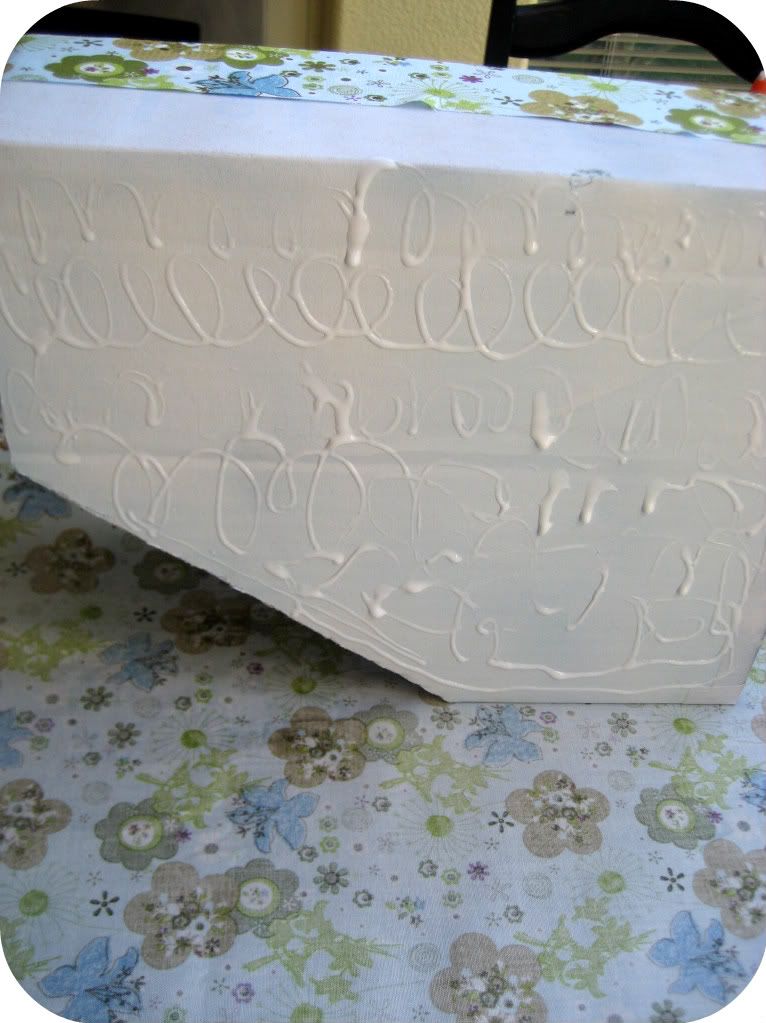
      Step 4 - Cut your fabric into a rectangle large enough to wrap around the whole file folder.  Allow for at least 2" of extra fabric on the top, bottom and sides so that you can tuck and glue it with ease.  Glue your fabric to the cardboard.  The seam should start and end in the back.  And remember to check that the pattern is oriented in the right direction on your file folder.

      At this point your file folder looks like this.  (Note that I didn't cut the fabric to along the slanted edges yet.  It's easier to trim those pieces after gluing to the sides).


      Step 5
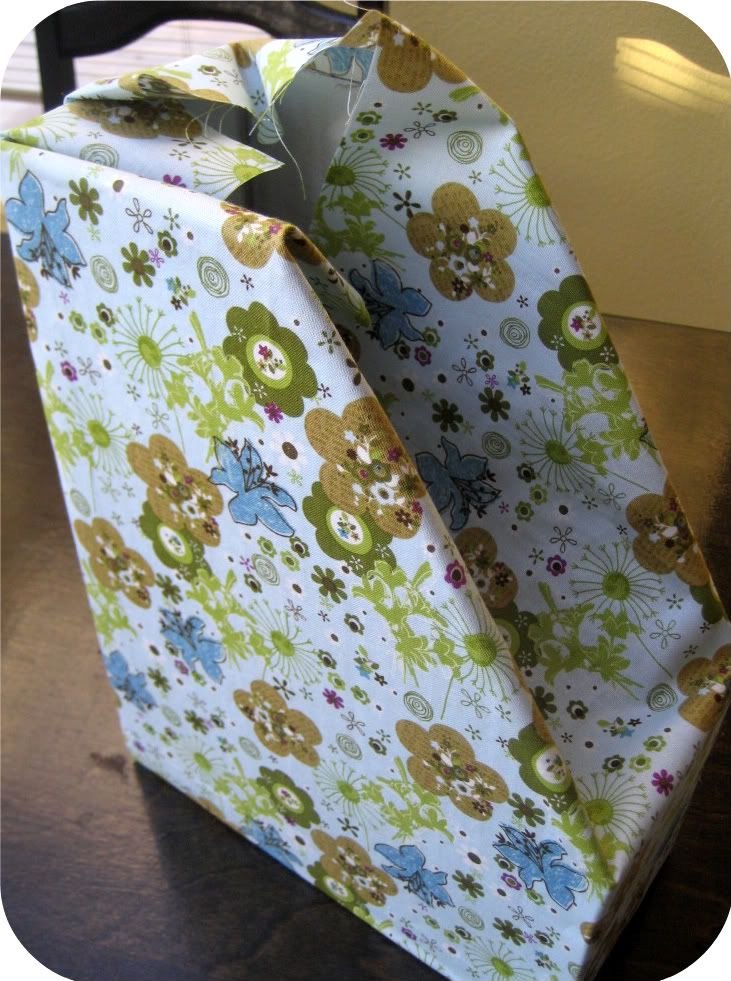
      Step 5 - Trim the excess fabric, fold neatly inside the corners (pleats work well), and glue.

      Step
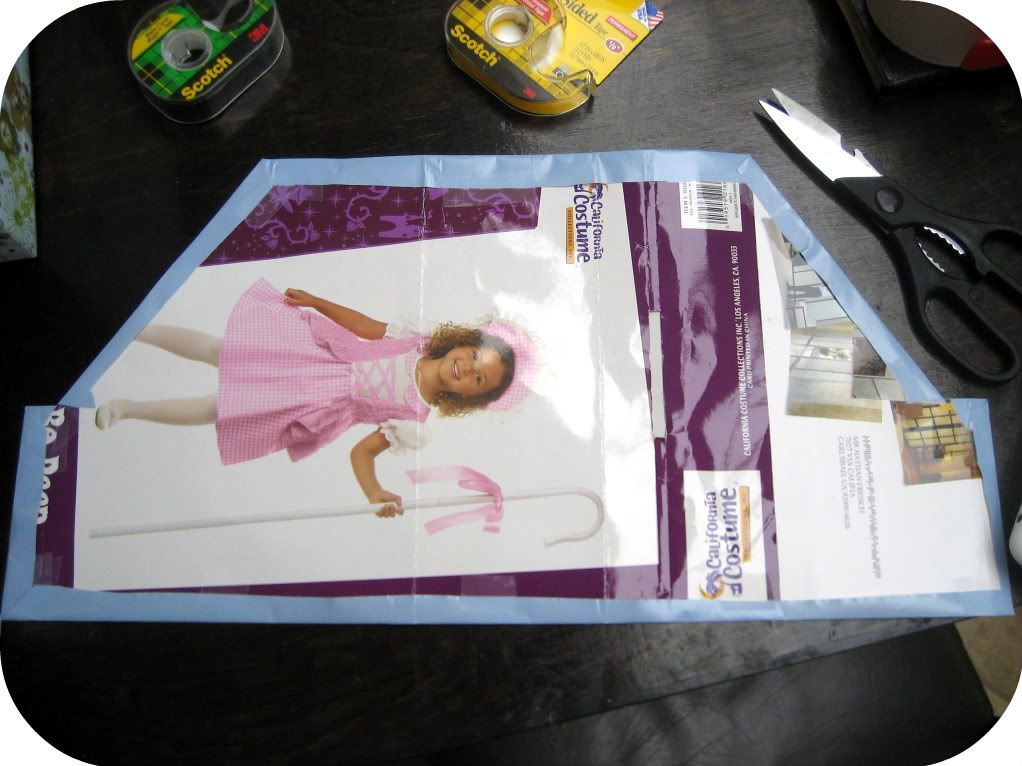
      Step 6 - Take some coordinating colored paper and cut it to fit inside the file folder.  I used blue wrapping paper because I liked its glossy finish.  But it was also very flimsy.  So I taped it around a thicker piece of card stock.  And by card stock, I mean a couple junk mail fliers taped together and trimmed to size.

      Step 7

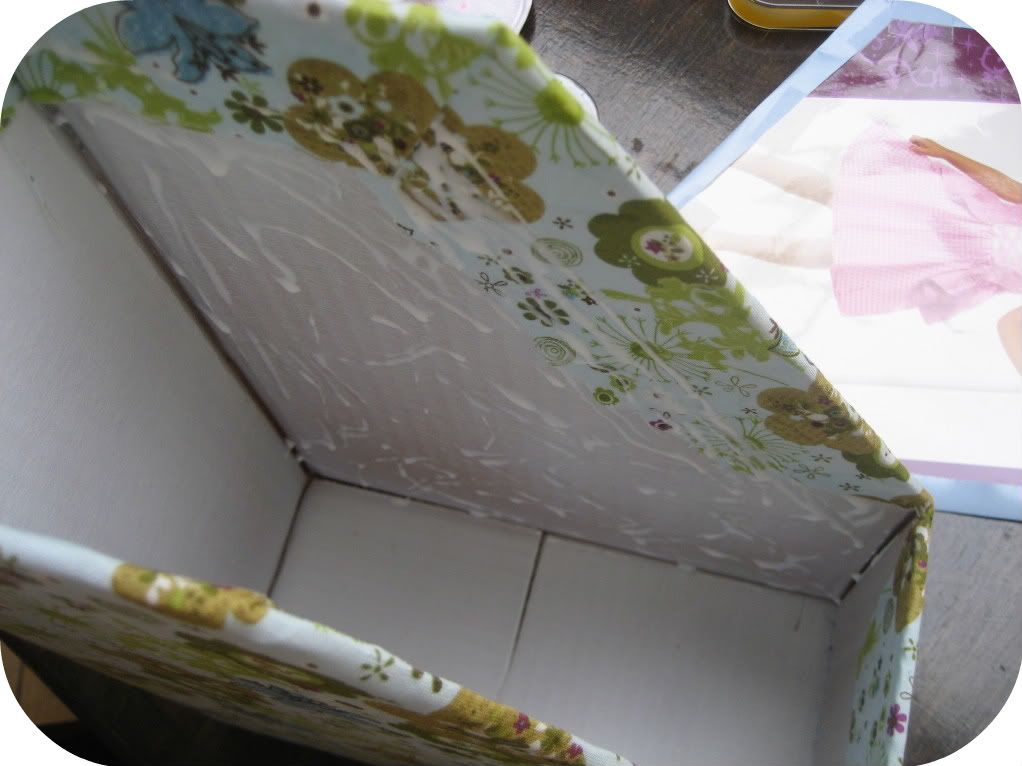
      Step 7 - Last step! Glue the colored paper (exposed side of the flier faces the glue) into the file folder.  I turned my file folder on its side and laid a heavy book inside it to help the colored paper bond nice and flat to each side of the file folder. You could also use contact paper instead and skip the gluing.

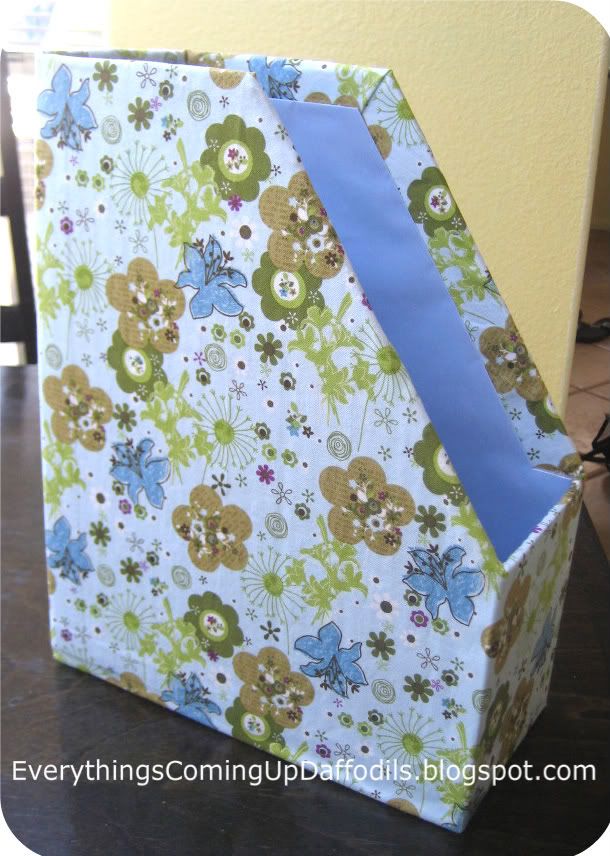
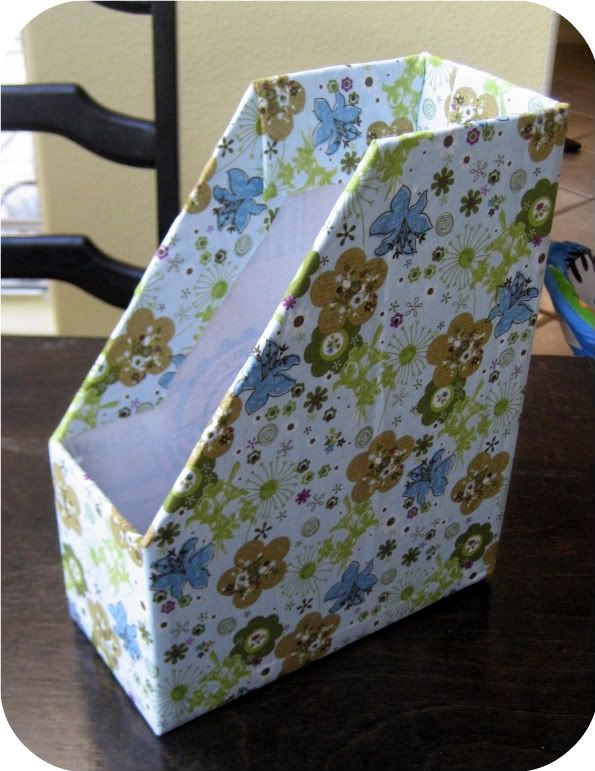
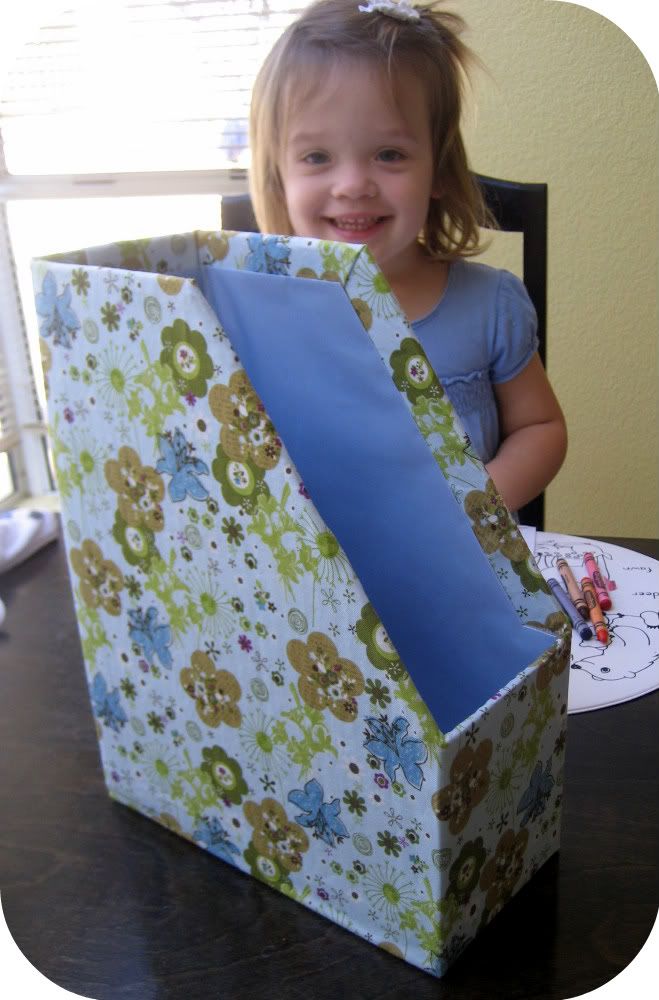
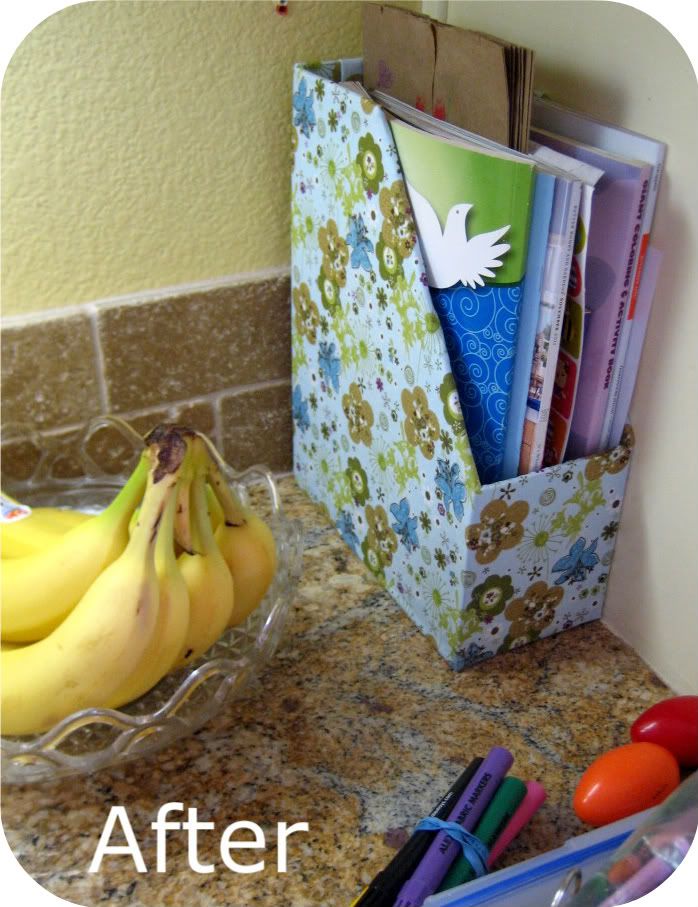
      And the finished product with the world's cutest product model too.  Those Barker Beauties ain't got nothin' on this.


      We had a "before" so we need an "after".  One more time.


      I can see more counter space already.  On our way to Organizational Bliss!

      post signature

      November 4, 2011

      Organizational Bliss Series: A Kitchen Cabinet Overhaul


      Welcome to the first real post in the Organizational Bliss series. As I begin here, please understand that I'm inviting you into the middle of this madness.  I started this project months ago and didn't have the forethought then to take those gnarly "before" shots that look so nice juxtaposed with the "afters".  But there's still some eye candy and a helpful tip or two to be had here.  Above is one side of a re-organized kitchen cabinet.  I'll zoom in on it below and point out some of my prouder moments while I whipped this baby into shape.

      Wait. Wait. You still want the before shot, don't you?  I honestly considered undoing all my hard work and putting the cabinets back to their original state of disorder.  And then my eye began to twitch at the thought.  I couldn't do it.  Let's compromise. I'll cartoon one.


      That captures the general idea I think. Okay, now on with the show.

      First stop, top level.  


      Doesn't look like much, does it?  That's because you don't see what used to be there.  Three very useful stacked serving plates once took up residence on the top of this shelf.  I use those plates routinely and getting to them required not only moving out of the way babies scooting around on the floor, but also dragging a chair over as makeshift step ladder to get up to them.  Lesson #1 about kitchen organization: The most used items get first dibs on the most accessible places and vice versa. Now my mom's hand-me-down Wilton cake decorating manuals (well loved, but less used) have traded spaces with the plates.  The plates are in an easy to access location in another cabinet while the cake manuals do just fine up there.  Look at them. They like the view.  I think they're even smiling.

      Next stop, Level 3.  This is a good one.


      It's the dessert decor shelf.  I can't overemphasize what a wreck this was before.  Bags upon bags of marshmallows hidden underneath birthday cake candles, cupcake liners, food dye and sprinkles. Everything tumbling about.  This shelf failed in every way before three neat little bins came to its rescue.  Their 11 inch depth is perfect for this shelf, the sloped openings give me easy access, and the clear sides make it a breeze to see what's what.  Another perk about bins is that they make cleaning the shelf below a cinch. Just slide them out and wipe down the surface.  And they contain any spills or leaks from the items stashed inside. A simple ZipLoc bag now corals Marshmallow Mountain.  What was I thinking when I bought all those marshmallows?  Oh yeah. I was thinking, "I know I have marshmallows somewhere, but I can't find them in this mess so I'll have to buy more."  (Want to know where I scored those bins?  Read on for a link and a coupon code).

      Next stop down, it's boxes and bottles on Level 2.


      Sorry for the glare off that box of cornmeal.  And yes, we have a mild addiction to Magic Shell and chocolate chips.  But judge our eating habits later! Just admire the fourth bin that's nicely housing the dessert chips and shredded coconut. Now that they're not spilling about, the boxes and bottles can be stacked side by side and reached without having hold back the other stuff.  And that blue bag?  That's Powdered Sugar.  He's just gonna hang out there for now. 

      Grand finale on the bottom floor.


      Another kitchen organization tip: Group items together that will be used together.  For instance, our baking spices, mixer, and measuring cups and spoons are all located in close range to each other in the baking "nook", which is just a cute way of referring to the spot I set aside for them in the cabinets above and below the mixer.  During this overhaul, the baking spices got upgraded to stadium seating. But shhh, don't tell them that they're really sitting in the cheap seats because that tiered Mainstays spice rack was less than $5 at my local Walmart.  And it's worth every penny.  Its three tiers prop up each bottle enough for me to see them, but not so high that I can't fit items on the highest tier. Now the salt, shortening, and cornstarch can relax in peace on the right.  Baking soda is front and center. And it can be that way because the spice rack allows you to customize the depths of each tier, giving you exactly as much space as you want on each tier and the space before it.  Should I ever want to take the spice rack out and store it, all tiers collapse down into a nice, compact rectangle. Beautiful! 

      I believe I promised a link and a coupon code to those bins.  Here they are:

      The bins are made by Akro-Mils and can be found at ZoroTools.  These bins are quality stuff and well worth the original $14 a piece price tag, but I'm doing this Organizational Bliss project on a budget so that didn't cut it.   But this coupon code halves the price to a few cents over $7 a piece. 

      Enter ZT35H at checkout and you'll get $35 off an order of $60 or more. You need to order five bins to pass the $60 threshold for this discount, which I was happy to do as there is much more organizing in my future.  And the site offers free shipping on orders of $50 or more (pre-coupon code) so shipping is free.  It's a great deal. 

      If you can't buy that Mainstays spice rack, Amazon has four alternatives that I also considered.


      One more look at this new space. 


      Organizational bliss? Almost. One day I'll add some light colored paper on the back  wall to make the cabinet seem less dark and cave-like.  It's not quite done.  But it's 100% better.

      November 2, 2011

      Organizational Bliss Series Kickoff

      Your days are numbered, messy pantry.

      A few months back, I opened the cabinet door underneath our bathroom sink and grimaced.  It was a not-so-stacked mess of hair products tumbling over one another, styling tools with cords twisting around each other like a pile of snakes, and q-tips and cotton balls spilling out of their packages, and more. So much more.  Right then, I set my jaw and decided enough was enough. I didn't know it then, but I was diving head first into what has now become a bit of an obsession.  I became determined to find Organizational Bliss.   It's a term that aptly defines the euphoric feeling I get when a cluttered, dysfunctional space is turned into a lean, mean, functioning zone. And I want you to enjoy it too. I want to invite you to my house and not feel ashamed for what lurks behind my kitchen cabinet doors.  More basic than that, I want you to come to my house and not fear for your life because some heap might finally give way from a disorganized shelf and attack you if you were to open said cabinet doors.  It's more than just the kitchen.  It's the whole darn house.  The whole shebang is getting an overhaul one organizational challenge at a time.  And I'm doing it on budget which means DIY, DIY, DIY.  The tutorials will naturally follow. So tag along on my Organizational Bliss series and be inspired too.  It's craziness to live in fear for what's hiding in the cabinets.  It could be a lawsuit too. 

      A girl can dream, right?